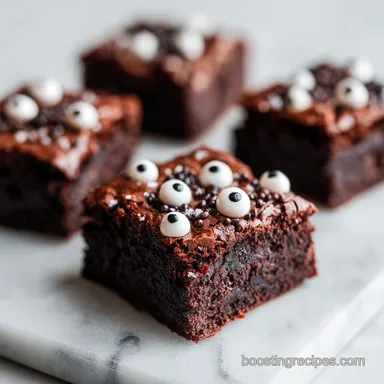
Spooky Eyed Halloween Brownies: Dairy Free and Fudgy
- Time:15 minutes active + 30 minutes bake = Total 45 minutes
- Flavor/Texture Hook: A shatter crisp top with a velvety, gooey center
- Perfect for: Spooky party platters, dairy-free dessert swaps, or a themed kid's activity
- The Secret to These Spooky Eyed Halloween Brownies Dairy Free
- The Logic Behind the Fudgy Texture
- The Component Analysis for Better Bakes
- Selecting Your Essentials and Smart Swaps
- Creating Your Monster Brownies
- Fixing Common Texture Issues
- Adjusting for Different Quantities
- Debunking Brownie Beliefs
- Storage and Waste Reduction
- Pairing Your Treats
- Recipe FAQs
- 📝 Recipe Card
The Secret to These Spooky Eyed Halloween Brownies dairy free
The scent of melted vegan butter and deep cocoa always hits me first, filling the kitchen with that heavy, chocolatey aroma that signals something good is happening. I remember the first time I tried to make a "monster" treat for a neighborhood get together a few years back.
I wanted that visual punch - the kind of dessert that makes people stop mid conversation - but I had a few guests who couldn't do dairy. I spent an hour trying to find a substitute that wouldn't make the brownies taste like a cardboard box.
That's when I realized the trick isn't just about swapping the butter, it's about how you handle the sugar and eggs. I remember the absolute panic when my first batch came out looking like a chocolate cake instead of a fudgy square. I'd overmixed the flour, turning a dense treat into something airy and light.
It wasn't "wrong," but it wasn't that rich, sinful texture you crave during October. I had to start over, folding the flour in with a gentle hand, and suddenly, there it was - that glossy, tight crumb that could actually hold up a giant frosting eye.
Now, whenever Halloween rolls around, these eyed halloween brownies dairy free are my go to. There's something so satisfying about piping those mounds of frosting and popping a candy eye on top. It turns a simple bake into a bit of a project that feels like magic when you pull the pan out of the oven.
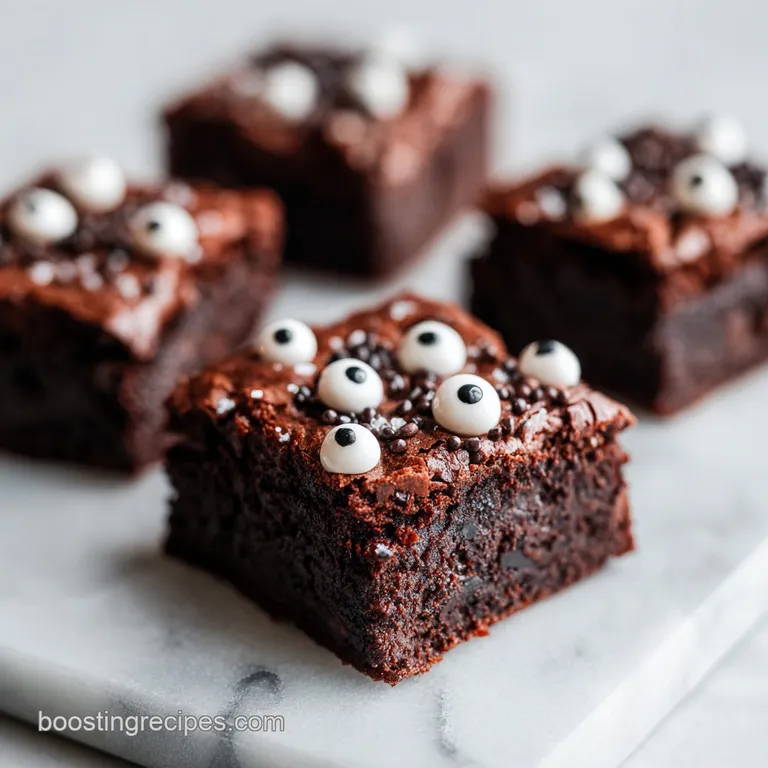
You get that distinct crackle on top, a velvety center, and a look that's just the right amount of creepy.
The Logic Behind the Fudgy Texture
Instead of a cakey crumb, we're aiming for something that feels almost like a truffle in brownie form. It all comes down to how the ingredients interact during the first few minutes of mixing.
Sugar Dissolution: Whisking the melted butter and sugar until glossy helps the sugar begin to dissolve, which creates that thin, shatter like crust on top.
Fat to Flour Ratio: By keeping the flour amount low, we prevent the development of a strong gluten network, ensuring the center stays dense and gooey.
Emulsion Stability: Adding eggs one at a time and whisking vigorously binds the fats and liquids, preventing the batter from separating in the oven.
Air Control: Folding the flour with a spatula instead of a mixer stops us from adding too much air, which is the primary reason brownies become cakey.
| Servings | Ingredient Adjustments | Pan Size | Cook Time |
|---|---|---|---|
| 12 brownies | Standard recipe | 8x8 inch | 30 minutes |
| 24 brownies | 2x Ingredients | 9x13 inch | 35-40 minutes |
| 6 brownies | 1/2 Ingredients | 6x6 inch | 20-25 minutes |
This table helps you plan for different crowd sizes. If you're scaling up to a 9x13 pan, remember that the edges will set faster than the middle, so keep a close eye on that center wobble.
The Component Analysis for Better Bakes
Understanding what each part of the recipe actually does allows you to tweak things without ruining the batch. For these halloween brownies dairy free, the balance of fats is everything.
| Ingredient | Science Role | Pro Secret |
|---|---|---|
| Vegan Butter | Provides moisture and structure | Use a stick form rather than tub margarine for a cleaner melt |
| Cocoa Powder | Adds deep flavor and acidity | Sift it first to avoid those tiny bitter clumps |
| Eggs | Binds and provides lift | Room temperature eggs incorporate faster and create a better emulsion |
| All Purpose Flour | Provides minimal structure | Measure by weight (grams) to avoid adding too much flour |
Selecting Your Essentials and Smart Swaps
When you're making brownies dairy free, the quality of your cocoa and butter substitute will dictate the final taste. I've found that some vegan butters have a strange aftertaste, so I usually stick to the brands that mirror the flavor of traditional butter as closely as possible.
For the Base
- ½ cup (115g) vegan butter, meltedWhy this? Essential for that rich, melting mouthfeel
- 1 cup (200g) granulated sugarWhy this? Creates the characteristic crackly top
- ½ cup (45g) unsweetened cocoa powderWhy this? Pure chocolate flavor without extra sugar
- ¼ tsp (1.5g) saltWhy this? Cuts through the sweetness
- ¼ tsp (1.2g) baking powderWhy this? Gives just a tiny bit of lift
- 2 large (100g) eggs, room temperatureWhy this? Binds everything into a fudgy mass
- 1 tsp (5ml) vanilla extractWhy this? Rounds out the chocolate notes
- ½ cup (65g) all purpose flourWhy this? Keeps the structure without making it cakey
For the Spooky Eye Frosting
- 1 cup (120g) powdered sugarWhy this? Creates a stiff, pipeable peak
- 2 tbsp (30ml) dairy-free milk (almond or oat)Why this? Adjusts consistency
- 1 tbsp (15g) vegan butter, softenedWhy this? Adds a velvety sheen
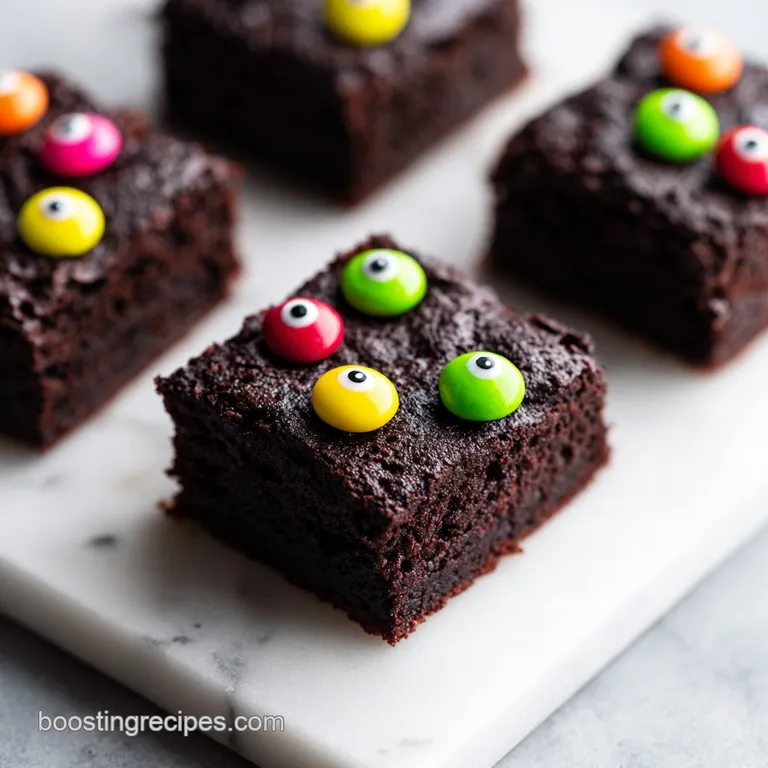
- 1 drop (0.5ml) violet or green food coloringWhy this? For that monster aesthetic
- 12 dairy-free candy eyeballsWhy this? The finishing creepy touch
| Original Ingredient | Substitute | Why It Works |
|---|---|---|
| Vegan Butter | Coconut Oil (melted) | Similar fat content. Note: Adds a slight coconut flavor |
| All Purpose Flour | Almond Flour | High fat, low gluten. Note: Makes it denser and grainier |
| Almond/Oat Milk | Soy Milk | Higher protein. Note: Frosting may hold its shape slightly better |
| Granulated Sugar | Coconut Sugar | Natural sweetener. Note: Results in a darker, earthier flavor |
If you're using coconut oil, just be aware that the brownies might feel slightly "oilier" on the tongue. It still works beautifully, but the stick style vegan butter usually gives a more traditional bakery result.
Creating Your Monster Brownies
Right then, let's get into the actual process. The key here is patience, especially during the cooling phase. If you frost these while they're even slightly warm, your monster eyes will slide right off the brownies.
Phase 1: Prepping the Base
Start by preheating your oven to 350°F (175°C). Grab an 8x8 inch baking pan and line it with parchment paper. I always leave an overhang on the sides - it's the only way to get these out without them breaking into a million pieces.
Now, whisk your melted vegan butter and sugar together. You're looking for a glossy appearance here. It won't be fully combined like a cake batter, but it should look shiny and integrated. Stir in the cocoa powder, salt, and baking powder. Make sure it's smooth; if you see lumps of cocoa, keep stirring.
Phase 2: Incorporating the Structure
Add the eggs one at a time. This is a crucial part. Whisk vigorously after each egg. You're building an emulsion, and if you rush this, the batter can break. Stir in the vanilla extract.
Now, get your spatula. Fold in the flour using a gentle motion. Stop the second you don't see any white streaks. Overmixing at this stage is where most people go wrong - it develops the gluten and turns your fudgy brownies into a sponge cake.
Phase 3: The Bake and Cool
Pour the batter into your prepared pan and smooth the top with your spatula. Pop them in the oven and bake for 25–30 minutes.
You're looking for a specific cue: the sides should start to slightly pull away from the pan, but the center should still have a slight wobble when you gently shake the pan. If they look completely firm, they're overbaked. Remove them and let them cool completely in the pan.
Trust me, waiting is the hardest part, but it's the only way to ensure that velvety center doesn't collapse.
Phase 4: Creating the Monster Look
While the base cools, whisk your powdered sugar, dairy-free milk, and softened butter. You want stiff peaks to form, so don't overdo the milk. Add your food coloring - a drop of green or violet works best.
Transfer the frosting to a piping bag. Pipe a generous, rounded mound onto each of the 12 brownies. Finally, place one dairy-free candy eyeball on top of each mound. They'll look like little monsters staring back at you.
Chef's Tip: To get a perfectly smooth frosting, use a hand mixer on low speed first, then switch to a high speed for 30 seconds to whip out any air bubbles.
Fixing Common Texture Issues
Even the best of us hit a snag sometimes. Most brownie problems come down to temperature or mixing speed.
The Reason Your Base is Too Cakey
If your brownies feel like a chocolate sponge, you've likely incorporated too much air or developed too much gluten. This happens when you use an electric mixer for the flour or whisk too aggressively.
The Reason Your Frosting Separates
Dairy-free frosting can be finicky. If the vegan butter was too cold or the milk was too hot, the frosting might look curdled. It usually just needs a minute of vigorous whisking to come back together.
The Reason the Top Didn't Crackle
A dull top usually means the sugar didn't dissolve enough into the fat. Ensure your butter is fully melted and you whisk the sugar in thoroughly until the mixture is glossy.
| Problem | Root Cause | Solution |
|---|---|---|
| Center is raw/liquid | Underbaked | Bake for another 5 mins; check center wobble |
| Dry, crumbly texture | Overbaked | Remove from oven 2 mins earlier next time |
| Frosting is too runny | Too much milk | Whisk in 1-2 tbsp more powdered sugar |
To make sure you hit the mark every time, keep this quick checklist handy while you're in the kitchen.
- ✓ Pat the pan edges with parchment paper for a clean release.
- ✓ Use room temperature eggs to avoid "shocking" the melted butter.
- ✓ Fold flour by hand - never use a mixer for the final step.
- ✓ Use a toothpick to check the center; it should come out with moist crumbs, not wet batter.
- ✓ Cool the pan fully before attempting to frost.
Adjusting for Different Quantities
If you're making these for a huge party or just a small treat for yourself, you'll need to adjust the proportions.
Scaling Down (Half Batch) For a half batch, use a 6x6 inch pan. Reduce the baking time by about 20%, starting your check at 20 minutes. Since you can't easily use one egg, crack an egg into a bowl, beat it, and then measure out half by weight or volume.
Scaling Up (Double Batch) When doubling, a 9x13 inch pan is your best bet. Be careful with the salt and baking powder - only increase those to 1.5x the original amount to avoid a metallic taste or too much rise. Reduce the liquids by about 10% to keep the fudge factor high.
Baking Large Quantities If you're baking multiple pans at once, lower the oven temp by 25°F (to about 325°F) and extend the time by 5-10 minutes. This ensures the heat circulates evenly and the edges don't burn while the centers stay raw.
| Method | Time | Texture | Best For |
|---|---|---|---|
| Standard Bake | 30 min | Fudgy/Chewy | Classic party treats |
| Slow Bake (Lower Temp) | 40 min | Extra Dense | Gourmet style |
| Quick Bake (Higher Temp) | 20 min | Crispy edges | Fast cravings |
Most people prefer the standard bake, but if you really love those charred, crispy edges, a slightly higher temp for a shorter time can give you that "burnt edge" vibe.
Debunking Brownie Beliefs
There's a lot of misinformation floating around about how to get the best results. Let's set the record straight.
The "Searing" Myth: Some people think you should "sear" the bottom of the pan on the stove before baking. This does nothing for the interior texture and usually just burns the butter.
The Flour Fallacy: A common belief is that adding more flour makes the brownies "richer." In reality, more flour just makes them cakier. For a rich result, lean into the fats (butter and eggs).
The Chilling Lie: You'll hear that you must freeze brownies before cutting. While chilling helps with clean lines, it's not necessary for the taste. Just let them reach room temperature completely.
Storage and Waste Reduction
These brownies hold up surprisingly well, but because they're dairy-free, the fats can behave differently in the fridge.
Keeping Them Fresh Store the unfrosted brownies in an airtight container at room temperature for up to 3 days. If they're already frosted, keep them in the fridge for up to 5 days.
To get that fudgy texture back after refrigerating, let a square sit at room temperature for 15 minutes before eating.
Freezing Guide You can freeze the unfrosted base for up to 2 months. Wrap them tightly in plastic wrap and then foil. Thaw them in the fridge overnight, then let them come to room temperature before frosting.
Zero Waste Tips If you have leftover frosting, don't toss it! Put it in a small jar and use it as a dip for apple slices or strawberries. If you have a bit of batter left in the bowl, scrape it into a greased muffin tin for a "chef's snack" brownie that bakes in about 12 minutes.
Pairing Your Treats
Since these are so rich and chocolatey, you want something to cut through that intensity.
Drink Pairings A glass of ice cold almond milk is the classic choice, but if you're serving these at a party, try a spiced apple cider. The tartness of the cider balances the heavy sweetness of the powdered sugar frosting.
Platter Ideas Place these on a platter with some fresh raspberries or sliced pears. The acidity of the fruit prevents the chocolate from feeling too heavy on the palate. For a more decadent spread, serve them alongside a dairy-free vanilla bean ice cream.
Texture Contrasts If you want to add a crunch, sprinkle a tiny bit of flaky sea salt on top of the frosting before adding the eye. It creates a salty sweet contrast that makes the cocoa flavor pop.
When you finally take a bite, you'll notice that the frosting is velvety and the base has that perfect, dense chew. It's the kind of treat that feels special without requiring professional equipment.
Whether you're making brownies dairy free for a specific diet or just want a fun project for the kids, the key is in the folding and the cooling. Just remember: don't rush the chill, and don't overmix the flour. Happy haunting!
Recipe FAQs
How to prevent brownies from becoming cakey?
Fold in the flour using a spatula just until no white streaks remain. Overmixing the batter changes the texture from fudgy to cakey.
How to tell when the brownies are done?
Bake for 25 30 minutes until the sides pull away from the pan. The center should still have a slight wobble to ensure they remain fudgy.
Is it true I can cut the brownies immediately after baking?
No, this is a common misconception. Let the brownies cool completely in the pan first so the fudgy center does not collapse.
How to store the frosted brownies?
Keep them in the fridge for up to 5 days. Use an airtight container to maintain freshness.
Can I use a higher oven temperature to bake these faster?
No, stick to 350°F (175°C). Higher temperatures will burn the edges before the center is properly set.
How to restore the fudgy texture after refrigerating?
Let a square sit at room temperature for 15 minutes. This allows the fats to soften and returns the desired mouthfeel.
How to ensure the brownies don't stick to the pan?
Line an 8x8 inch baking pan with parchment paper. Leave an overhang on the sides for easy removal.
Spooky Halloween Brownies