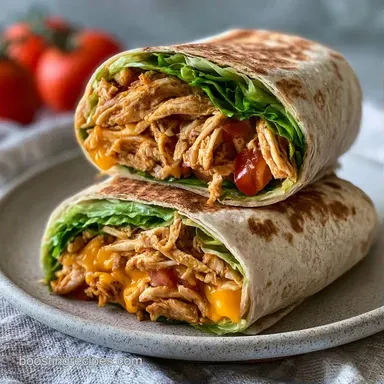
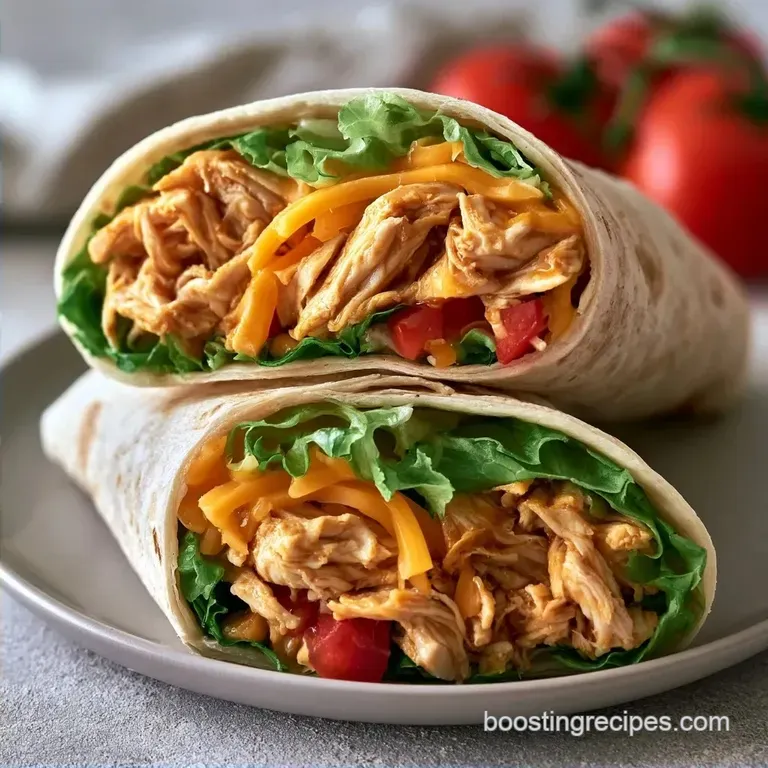
Chicken Wrap: 5-Minute Store Bought
- Time: 5 min active + 5 min cooking = Total 10 mins
- Flavor/Texture Hook: Mahogany colored, shatter crisp exterior with a creamy Caesar center
- Perfect for: Weeknight lunches, budget-friendly meal prep, or quick hunger fixes
The sound of butter hitting a hot skillet and that immediate, aggressive sizzle is the only way to start a lunch like this. I remember the first time I tried making these at home, I just rolled everything up and ate it cold. It was fine, but it felt like a sad office lunch.
Then I realized that the secret isn't just the filling, it's the heat. When you sear that seam, the whole thing transforms from a basic sandwich into something that feels like it came from a high end deli.
Handheld meals like this have a deep history, evolving from traditional flatbreads used in the Middle East and Mexico to the modern wraps we see everywhere today. It's all about portability and efficiency.
For me, the Chicken Wrap is the ultimate "I have nothing in the fridge" meal because it relies on a store-bought rotisserie chicken, which is basically a cheat code for home cooks.
You can expect a meal that hits every note. You've got the crunch of the Romaine, the sharp bite of the red onion, and the richness of the Caesar dressing. By the time you finish reading this, you'll know exactly how to avoid the dreaded "soggy bottom" and how to get that gold standard crust.
Trust me on this, the sear is non negotiable.
The Best Easy Chicken Wrap
Right then, let's talk about why this works. Most people just throw everything in a tortilla and hope for the best, but that's how you end up with a wrap that falls apart in your hands. The trick is all in the architecture.
By placing the cheese and lettuce down first, you're creating a physical wall that stops the dressing and tomato juices from soaking into the flour tortilla.
It's a simple fix, but it changes everything. When you combine that layering with a quick sear in butter, you're not just heating the food, you're "welding" the wrap shut. This is what separates a basic Bought Chicken Wrap from something that actually holds its shape while you eat it.
If you're looking for something with a different flavor profile, you might enjoy my Asian Chicken Wraps, but for a classic, Caesar style vibe, this is the gold standard.
Common Recipe Failures
I've seen a lot of people struggle with these, usually because they overstuff the tortilla or forget the heat. When you put too much filling in, the structural integrity vanishes, and you're basically eating a salad with a piece of bread on the side. Keep your portions controlled so you can actually roll it tight.
- Moisture Barrier
- Placing cheese and lettuce first prevents the tortilla from absorbing liquids.
- Heat Setting
- Medium heat ensures the butter browns the wrap without burning the flour.
- The Seal
- Placing the wrap seam side down locks the ingredients in place.
- Protein Prep
- Dressing the chicken beforehand ensures every bite is seasoned, not just the edges.
| Method | Time | Texture | Best For |
|---|---|---|---|
| Stovetop | 5 mins | Shatter crisp, buttery | Single servings, maximum crunch |
| Oven | 12 mins | Uniformly toasted, drier | Batch prepping 5-10 wraps |
Quick Recipe Specs
Before we dive into the gear, let's look at the components. I'm using a rotisserie chicken here because it's faster and often more flavorful than poaching a breast. It's a budget smart move that saves you 30 minutes of active cooking time.
| Ingredient | Science Role | Pro Secret |
|---|---|---|
| Rotisserie Chicken | Main Protein | Shred while warm for easier pulling |
| Flour Tortilla | Structural Shell | Warm slightly before rolling to prevent cracks |
| Caesar Dressing | Emulsifier/Flavor | Toss with chicken first to lock in moisture |
| Romaine Lettuce | Texture/Barrier | Slice thinly to create a flat, stable base |
Essential Ingredients
Don't go for the low-fat cheese here. You need the fat to create that velvety melt that acts as your waterproof layer. Similarly, use a large tortilla - the 12 inch size is mandatory for a secure roll.
- 3 cups (450g) store bought rotisserie chicken, shredded Why this? Pre cooked, seasoned, and saves massive time
- 2 cups (60g) Romaine lettuce, thinly sliced Why this? Sturdy crunch that doesn't wilt instantly
- 1/2 cup (60g) sharp cheddar cheese, shredded Why this? High meltability and strong flavor profile
- 1/4 cup (30g) red onion, thinly sliced Why this? Adds a necessary sharp contrast to the creamy dressing
- 2 medium (120g) tomatoes, diced Why this? Fresh acidity to cut through the richness
- 1/2 cup (120ml) Caesar dressing Why this? Classic savory, salty, and creamy pairing
- 4 large (12 inch) flour tortillas Why this? Necessary surface area for a tight fold
- 1 tbsp (15ml) unsalted butter, melted Why this? Creates the mahogany crust and prevents sticking
| Original Ingredient | Substitute | Why It Works |
|---|---|---|
| Flour Tortilla | Corn Tortilla | More authentic. Note: Must be steamed or they'll shatter |
| Sharp Cheddar | Pepper Jack | Similar melt. Note: Adds a spicy kick to the wrap |
| Rotisserie Chicken | Grilled Breast | Leaner protein. Note: May be drier than rotisserie |
| Romaine Lettuce | Spinach | Nutrient dense. Note: Less crunch, more velvety texture |
Since we're focusing on a budget friendly approach, using a store bought Chicken Wrap base is the smartest way to go. You get the quality of a deli without the $15 price tag.
Required Kitchen Gear
You don't need a fancy kitchen for this. A basic non stick skillet is your best friend here. If you have a panini press, that works too, but the skillet gives you more control over the browning.
- Non stick skillet (10 or 12 inch)
- Large mixing bowl
- Chef's knife and cutting board
- Spatula or press (to flatten the wrap)
Step by step Guide

Let's crack on. Make sure your ingredients are prepped and ready to go - this is a fast process once the skillet is hot.
- Shred the store-bought rotisserie chicken and toss it in a mixing bowl with 2 tbsp (30ml) of the Caesar dressing until evenly coated. Note: This prevents the chicken from tasting dry inside the wrap.
- Lay a flour tortilla flat on your workspace.
- Place a portion of shredded cheddar cheese in the center of the tortilla.
- Add a layer of sliced romaine lettuce directly on top of the cheese to create a moisture barrier.
- Add the seasoned chicken, diced tomatoes, and sliced red onion on top of the lettuce layer.
- Fold the sides of the tortilla inward and roll tightly from the bottom up to secure the filling.
- Heat a non stick skillet over medium heat with the melted butter.
- Place the Chicken Wrap seam side down in the skillet and press lightly for 60-90 seconds until the exterior is mahogany colored and crisp.
Chef's Tip: If your tortilla feels stiff, microwave it for 10 seconds between a damp paper towel before rolling. It makes it way more pliable and prevents those annoying cracks.
Troubleshooting Your Wrap
The most common issue is the wrap splitting during the roll. This usually happens if the tortilla is too cold or you've gone overboard with the filling. If the tortilla tears, you can patch it with a small piece of cheese, which will melt and seal the gap during the sear.
| Issue | Solution |
|---|---|
| Why Your Wrap Is Soggy | If you find the bottom of your Chicken Wrap is damp, you likely skipped the cheese/lettuce barrier or added the tomatoes directly onto the tortilla. The tomatoes are the main culprits here. |
| Why Your Tortilla Tears | Cold tortillas are brittle. When you try to fold them tightly, the gluten bonds aren't flexible, causing the wrap to split. A quick warming solves this immediately. |
| Why The Sear Is Uneven | This happens when the pan isn't hot enough or you're using too little butter. You want a consistent sizzle across the entire surface of the wrap. |
Common Mistakes Checklist
- ✓ Did you place the cheese before the lettuce?
- ✓ Is the seam side facing down in the pan?
- ✓ Did you shred the chicken finely enough?
- ✓ Was the tortilla warmed for 10 seconds?
- ✓ Did you avoid overstuffing the edges?
Creative Flavor Twists
Once you've nailed the basic Chicken Wrap, you can start playing with the flavors. I love swapping the Caesar dressing for a spicy buffalo sauce and adding some blue cheese crumbles. It's a total flavor bomb.
For a fresher vibe, try a Greek twist. Swap the cheddar for feta and add some kalamata olives and a dollop of tzatziki. It's a great way to use up leftover rotisserie chicken if you're bored of the same routine.
If you want to go fully international, you can explore some Quick chicken wrap recipes that use peanut sauce and shredded carrots. This is a great way to transition from a heavy lunch to something lighter and zingier.
Decision Shortcut:
- If you want it Spicy → Use Buffalo sauce and Pepper Jack cheese.
- If you want it Fresh → Use Feta, Cucumber, and Tzatziki.
- If you want it Hearty → Add sliced avocado and double the cheddar.
Scaling the Batch
When I'm prepping these for the week, I don't sear them all at once. If you do, they'll lose that shatter crisp texture by Wednesday. Instead, prep the filling in a large bowl and assemble the wraps.
For a double batch, don't just double the butter - use about 1.5x the amount to avoid a greasy pan. Work in batches of two wraps per skillet to ensure you have enough room to press them down. If you're making 10+ wraps for a party, the oven is your best bet.
Place them on a baking sheet at 400°F (200°C) for about 10-12 minutes, flipping halfway through.
Debunking Wrap Myths
You'll often hear that searing a wrap "seals in the juices." That's not actually true. Searing is about texture and structural integrity, not moisture retention. The juices are already there; the heat just makes the experience better.
Another myth is that cold wraps are healthier. While you save a few calories by skipping the butter, you lose the textural contrast that makes the dish satisfying. A few calories of butter are a fair trade for a mahogany crust.
Storage and Waste Tips
If you have leftovers, store the filling separately from the tortillas. Assembled wraps in the fridge tend to get gummy. Store the dressed chicken and veg in an airtight container for up to 3 days.
When it comes to zero waste, don't throw away the rotisserie chicken carcass. Throw it in a pot with water, a carrot, and some celery to make a quick stock. It's a great base for a soup later in the week. If you have leftover tortilla bits, fry them in a bit of oil and salt to make homemade chips.
Serving Suggestions
I like to serve this Chicken Wrap with a side of crisp sweet potato fries or a light side salad. Because the wrap is so rich and buttery, something acidic or salty on the side balances it out.
If you want a dipping sauce to take it to the next level, try some Sauce in 5 Minutes recipe. The tangy, savory profile of the sauce pairs surprisingly well with the creamy Caesar filling. Just dip the corner of the wrap into the sauce and enjoy that contrast of flavors.
Right then, you've got everything you need. Whether you're using a Bought Chicken Wrap method for speed or taking your time to customize the flavors, the key is the sear. Get that pan hot, get that butter sizzling, and enjoy a lunch that actually feels like a treat.
Recipe FAQs
Are chicken wraps ok for diabetics?
Yes, with substitutions. Replace the flour tortilla with lettuce leaves to significantly lower the refined carbohydrate count.
What do you usually put in a chicken wrap?
Shredded rotisserie chicken, romaine lettuce, cheddar cheese, red onion, and diced tomatoes. For a different protein texture, try a grilled chicken variation.
How to prevent a chicken wrap from becoming soggy?
Place a layer of shredded cheddar and romaine lettuce first. This creates a moisture barrier that protects the flour tortilla from the tomatoes and Caesar dressing.
Is it true you must use raw chicken breasts instead of rotisserie?
No, this is a common misconception. store-bought rotisserie chicken is ideal for this recipe because it is already cooked and shreds easily for a fast meal.
How to stop the tortilla from tearing while rolling?
Ensure the tortilla is at room temperature and avoid overfilling. If a tear occurs, patch the gap with a small piece of cheese, which will melt and seal during the sear.
How to achieve a crisp, mahogany colored wrap?
Sear the wrap seam side down in a skillet with melted butter. Press lightly over medium heat for 60 90 seconds until browned.
How to store leftover chicken wrap ingredients?
Keep the filling and tortillas in separate containers. Assembled wraps become gummy in the fridge, but dressed chicken and vegetables stay fresh for up to 3 days.
store bought Chicken Wrap