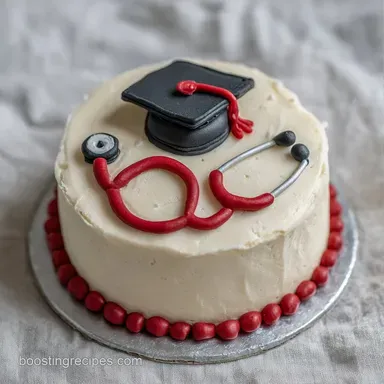
Homemade Nurse Grad Cake: Airy and Stable
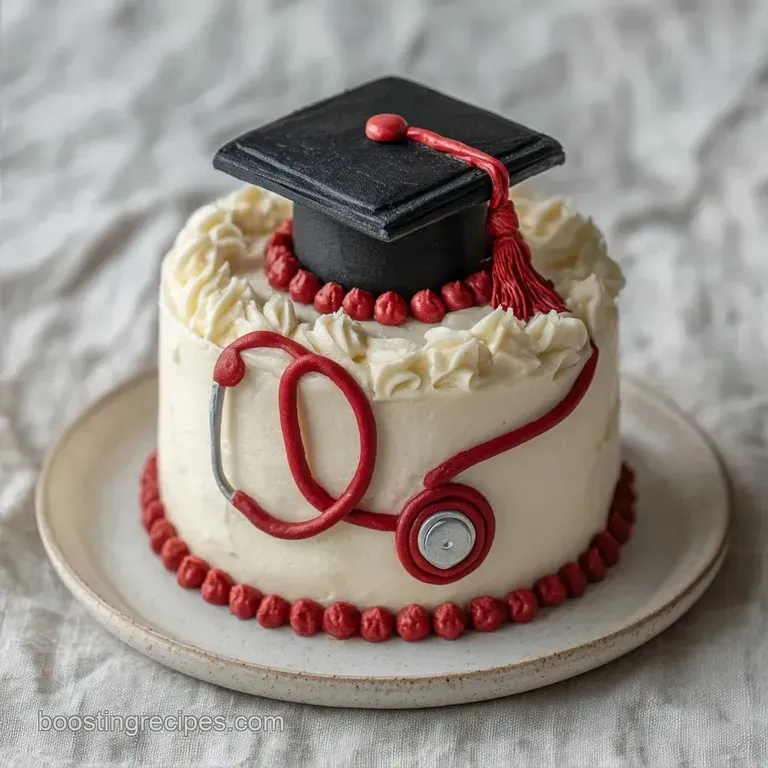
- Time: 25 min active + 2 hours chilling
- Flavor/Texture Hook: Airy vanilla crumb with a high viscosity buttercream
- Perfect for: Nursing school graduation parties, medical milestones, or a surprise for a new RN
- Homemade Nurse Grad Cake Guide
- What Makes It Stable
- What Each Ingredient Does
- The Gear You'll Need
- Steps to a Great Cake
- Fixing Common Cake Issues
- Troubleshooting Common Issues
- Swapping and Changing Flavors
- Adjusting the Serving Size
- Cake Baking Truths
- Keeping the Cake Fresh
- Designing the Nurse Theme
- Recipe FAQs
- 📝 Recipe Card
The smell of warm vanilla and melted butter always takes me back to my aunt's kitchen. I remember the first time I tried to make a celebration cake for her nursing graduation. I was so focused on the decorations that I forgot the most basic rule: let the cake cool.
I piled heavy frosting on a lukewarm sponge, and within twenty minutes, the whole thing started to lean like the Tower of Pisa. It was a disaster, but it taught me exactly how to handle a cake that needs to support heavy fondant decorations.
If you're planning a Homemade Nurse Grad Cake, you want something that tastes like a classic bakery treat but doesn't cost a fortune. This version uses simple pantry staples, focusing on the chemistry of the butter and sugar to get that professional lift without needing expensive additives. It's a budget friendly approach that focuses on technique over fancy ingredients.
You can expect a cake that's tender but strong enough to hold a stethoscope and a nurse's cap made of fondant. We're going for a clean, polished look that feels special. The secret isn't in the gear, but in the temperature of your ingredients and how you treat the crumb before the frosting hits the surface.
Homemade Nurse Grad Cake Guide
When people try to make a graduation cake at home, they often rush the process. They bake the cake, let it sit for ten minutes, and then start frosting. This is where things go wrong.
The heat from the center of the cake melts the butter in the frosting, leading to those dreaded "bubbles" or a cake that slides apart on the platter.
Another common mistake is over mixing the batter. I've seen so many people whisk their batter until it's perfectly smooth, only to find out the cake is tough and rubbery. Once the flour goes in, you have to stop. A few small lumps are fine. Those lumps are what keep the cake airy.
By focusing on a gentle mix and a long chill, this Homemade Nurse Grad Cake stays stable and tastes velvety.
The budget smart angle here is all about the butter. You don't need a $10 organic cultured butter to make this work. A standard store brand unsalted butter works perfectly as long as it's truly softened. If you beat it long enough with the sugar, you create the same air pockets that high end cakes have.
It's about the effort, not the price tag of the butter.
What Makes It Stable
The Butter Sugar Bind: Beating butter and sugar for 3-5 minutes creates tiny air bubbles. These bubbles expand in the oven, giving the cake its lift without needing extra leavening.
The Ribbon Stage: Mixing until the batter falls in a thick, slow trail (a ribbon) ensures the flour is hydrated but not over developed. This prevents the cake from becoming bread like.
The Chill Factor: Refrigerating the cakes for 2 hours firms up the fats in the sponge. This creates a solid "canvas" that prevents the buttercream from soaking in or sliding.
Viscosity Control: Adding heavy cream slowly to the powdered sugar creates a stiff, high viscosity frosting. This is what allows the nurse's cap and stethoscope to stay upright instead of drooping.
| Method | Time | Texture | Best For |
|---|---|---|---|
| From Scratch | 2 hrs 55 mins | Airy, tender crumb | Special celebrations, best flavor |
| Box Mix Hack | 1 hr 15 mins | Denser, more uniform | Last minute needs, consistent height |
| store-bought | 30 mins | Often oily or too sweet | Zero time scenarios, basic needs |
What Each Ingredient Does
| Ingredient | Science Role | Pro Secret |
|---|---|---|
| Unsalted Butter | Provides structure and fat | Use a microwave for 5 seconds if too hard |
| All Purpose Flour | Builds the cake's frame | Spoon and level to avoid packing it down |
| Powdered Sugar | Thickens the buttercream | Sift it first to avoid frosting lumps |
| Whole Milk | Hydrates proteins | Must be room temp to prevent butter curdling |
The Gear You'll Need
You don't need a professional kitchen to pull this off, but a few basics help. Two 8 inch round cake pans are mandatory. If you have a stand mixer, like a KitchenAid, use it for the buttercream to get that airy volume, but a hand mixer works too.
I highly recommend using parchment paper. Greasing the pan is okay, but a circle of parchment on the bottom means the cake will never stick. You'll also need a flat spatula or a bench scraper for those smooth, clinic clean sides of the cake.
For the decorations, a small rolling pin (or even a smooth wine bottle) helps you flatten the fondant for the nurse's cap.
Finally, get some gel food coloring. Liquid colors from the grocery store often thin out the frosting, making it runny. Gel colors give you that deep medical teal or bright red without changing the consistency of your buttercream.
Steps to a Great Cake
Mixing the Batter
Cream the softened butter and granulated sugar on medium high speed. Mix for 3-5 minutes until the color turns pale yellow and the texture feels fluffy.Note: This creates the air pockets needed for the rise.
Add the eggs one at a time. Beat after each egg until fully absorbed before adding the next. Note: Adding them too fast can cause the batter to break/curdle.
Whisk the flour, baking powder, and salt in a separate bowl. According to the guides at King Arthur Baking, measuring flour by weight (315g) is the most accurate way to avoid a dry cake.
Slowly alternate adding the dry ingredients and the whole milk. Mix on low speed just until the batter reaches a ribbon stage, where it falls in a thick trail. Note: Stop immediately once the flour disappears to keep the cake tender.
Baking to Perfection
Divide the batter evenly between two 8 inch pans. Bake at 350°F (180°C) for 30 minutes. Remove when a toothpick comes out clean and the edges slightly pull away from the pan.
Use the flat top cooling technique. Once the cakes are out, place a piece of parchment or a flat plate on top and press down gently. This levels the dome so you don't have to trim off half your cake.
Chill the cakes in the fridge for 2 hours. The cakes should feel firm to the touch.Note: This is the most important step for a stable Homemade Nurse Grad Cake.
Assembling the Design
Beat the butter and powdered sugar until smooth. Mix in heavy cream, vanilla, and salt. Beat on high until the frosting is stiff and holds a peak.
Place one chilled layer on a plate. Spread a thick layer of buttercream on top, then stack the second layer. Frost the top and sides with a smooth, white finish.
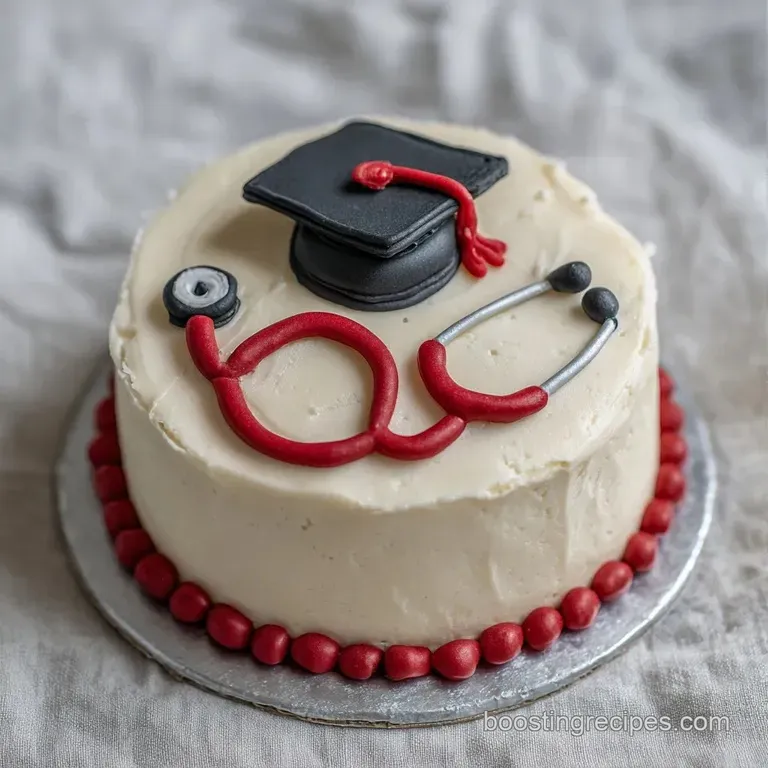
Use red gel coloring for the medical cross and blue/teal for the nurse's cap. Pipe the stethoscope using a small round tip, curving it around the side of the cake. Use white fondant for the cap, shaping it into a small semi circle.
Fixing Common Cake Issues
Troubleshooting Common Issues
| Issue | Solution |
|---|---|
| Why Your Cake Sank | If the center of your cake dipped, it's usually because the oven door was opened too early or there was too much baking powder. This causes the air bubbles to pop before the cake's structure has set. |
| Why Your Frosting is Runny | Runny frosting happens when the butter is too warm or you added too much cream. To fix it, pop the bowl in the fridge for 10 minutes, then beat it again. |
| Why the Layers are Sliding | This happens when the cake wasn't chilled long enough or the room is too hot. |
Common Mistakes Checklist
- ✓ Did you sift the powdered sugar? (Prevents lumps)
- ✓ Are the eggs at room temperature? (Prevents curdling)
- ✓ Did you chill the cakes for the full 2 hours? (Prevents sliding)
- ✓ Did you stop mixing once the flour vanished? (Prevents toughness)
- ✓ Is the butter truly softened, not melted? (Prevents collapse)
Swapping and Changing Flavors
If you want to move away from vanilla, this base is very flexible. For a more colorful look, you could try a Strawberry Cake recipe which gives you a naturally pink sponge that looks great with white frosting.
For those on a budget or with dietary needs, you can swap some ingredients without losing the "wow" factor. I've found that using a bit of Greek yogurt instead of some of the milk adds a nice tang and keeps the cake moist for longer.
| Original Ingredient | Substitute | Why It Works |
|---|---|---|
| Whole Milk (1 cup) | Buttermilk (1 cup) | More acidity. Note: Results in a more tender, tangy crumb |
| Unsalted Butter | Margarine (Stick) | Similar fat. Note: Slightly different flavor, less creamy finish |
| All Purpose Flour | gluten-free 1:1 Blend | Starch based. Note: Denser texture, may need 1 extra egg |
If you're serving this as part of a larger party spread, consider pairing the sweetness of this Homemade Nurse Grad Cake with something savory. My Homemade Samosas recipe is a great way to balance the sugar with some spice and crunch for the guests.
Adjusting the Serving Size
If you need a smaller cake, you can halve the recipe. Use 6 inch pans instead of 8 inch ones. You'll need to reduce the baking time by about 20%, so start checking the center at 20-22 minutes. Since you can't easily halve an egg, beat one egg in a small bowl and use half of the liquid.
For a massive party, you can double the recipe to make a three layer cake. When doubling, be careful with the salt and baking powder - only increase them to 1.5x the original amount to avoid a metallic taste.
Also, lower your oven temperature by about 15°C (25°F) and bake for a bit longer. This ensures the center cooks through before the outside burns.
Decision Shortcut
- Want a taller look? Use 6 inch pans and three layers.
- In a rush? Use a food processor for the buttercream.
- No fondant? Use stiff, colored buttercream to pipe the cap.
Cake Baking Truths
There is a common belief that you should "seal" the cake with a thin layer of frosting (a crumb coat) and then let it sit for a day. While a crumb coat is essential for a clean look, you don't need to wait a day. 30 minutes in the fridge is plenty.
Another myth is that more baking powder always means a higher cake. In reality, too much leavening creates bubbles that are too large to be supported by the flour. These bubbles pop, and the cake collapses in the center. Stick to the 1 tbsp measurement for a reliable rise.
Finally,, some say you must use a professional offset spatula for smooth sides. Honestly, a regular butter knife or a clean ruler can work if you're patient. It's all about the pressure you apply and the temperature of the cake.
Keeping the Cake Fresh
Store your Homemade Nurse Grad Cake in the fridge, especially since it has a high butter frosting. It will stay fresh for about 4-5 days. I recommend keeping it in an airtight cake carrier or a large plastic container to prevent it from picking up "fridge smells" from other foods.
If you have leftovers, you can freeze the cake layers (without frosting) for up to 3 months. Wrap them tightly in plastic wrap and then foil. When you're ready to eat them, let them thaw at room temperature for 2 hours before frosting.
To avoid waste, don't throw away the cake scraps from leveling the tops. Crumble them into a bowl, mix with a tablespoon of frosting, and roll them into small balls. These make great "medical themed" cake pops that you can dip in white chocolate.
Designing the Nurse Theme
The beauty of a Homemade Nurse Grad Cake is in the details. To make the stethoscope, roll a thin "snake" of blue or teal fondant. Curve it into a U shape and add a small circle at the bottom. This is the easiest way to get a clean look without needing professional sculpting skills.
For the nurse's cap, use white fondant. Roll it into a small oval and fold it slightly to create that classic cap shape. Use a tiny bit of red frosting to put a cross on the front. If you don't have fondant, you can use very stiff buttercream piped through a large round tip.
Finally, keep the colors simple. A white base with teal and red accents looks professional and clean, mirroring the medical environment. You can even write "RN" or "LPN" on the cake board using a piping bag for an extra personal touch. Trust me, the graduate will appreciate the effort more than a store-bought cake.
Whether you're a seasoned baker or this is your first time attempting a Homemade Nurse Grad Cake, just remember to take your time with the cooling. The patience you put into the chill pays off in a cake that stays upright and tastes velvety. Now, let's get baking and celebrate that hard earned degree!
Recipe FAQs
How to celebrate a nurse's graduation?
Host a themed party with a custom cake. Pair a celebratory meal with a dessert like our nurse graduation sheet cake to honor their hard work.
How to make a graduation cake from scratch?
Cream butter and sugar until fluffy, then mix in eggs, dry ingredients, and milk. Bake the batter in 8 inch pans for 30 minutes and decorate with fondant medical symbols once chilled.
What do you give someone graduating from nursing school?
Practical gear or a personalized treat. high-quality scrubs, a new stethoscope, or a homemade cake decorated with medical motifs are thoughtful and useful choices.
How to congratulate a nurse graduate?
Write a heartfelt card and prepare a celebratory dessert. Acknowledging their dedication with a custom decorated cake is a great way to show your support.
What are some DIY nurse graduation gifts?
Create a themed gift basket or bake a custom cake. You can combine nursing essentials with a cake featuring a piped stethoscope and nurse's cap.
Why did my nurse cake sink in the middle?
The oven door was likely opened too early. This causes air bubbles to pop before the structure sets, though using too much baking powder can also lead to this issue.
How do I fix runny frosting for the decorations?
Chill the frosting bowl in the fridge for 10 minutes. Beat the mixture again after cooling to achieve the high viscosity needed for stable piping.
Homemade Nurse Grad Cake